Need help with Lafette restoration
I have a Yugo Lafette that is generally in nice shape and complete, but with a battered paint finish. It was also totally packed, inside and out, with cosmoline and what looks like straw (must have been packed in a crate with straw?).
After a lot of struggling I was able to undo the rear pegs that hold the recoil sled to the Lafette frame, and undid the front axle and cotter pins. I now have the Lafette broken down into three main parts - fire control group, sled/mount, and legs/frame.
One issue I am having now is that the elevation wheel on the fire control box stopped working. I did not take anything apart here, just removed the unit as a hole from the recoil sled and arc shaped track. While cleaning, the wheel worked fine, and it would turn freely and the center piece would ratched up and down. Then, it was just frozen. The two adjustment levers set behind the wheel are also now frozen. I did take the cover off the wheel (screw, washer, wheel housing, large spring). I do not want to try to go further.
Also, how do you take the nuts that hold the large, triangular wing nuts in place on the two main legs?
Thanks !
-
- Administrator
- Posts: 3251
- Joined: Fri Jan 11, 2008 6:03 pm
- Anti-spam: Mg42
- Location: Florida
Re: Need help with Lafette restoration
The large left knob does push in and out. In locks everything in place, pull out or push the button on the right side of the search fire and the knob also goes out.
I'll try to help some more after I get home.
Later 42rocker
I'll try to help some more after I get home.
Later 42rocker
Re: Need help with Lafette restoration
Oooo so it does
Its not like the available manuals really tell you anything useful... I have a PDF of a Serbian manual and a translation of the WW2 German manual and they mostly either just describe things or say how to set it up... The Serb manual seems to say how to break it down, but I can't read it.
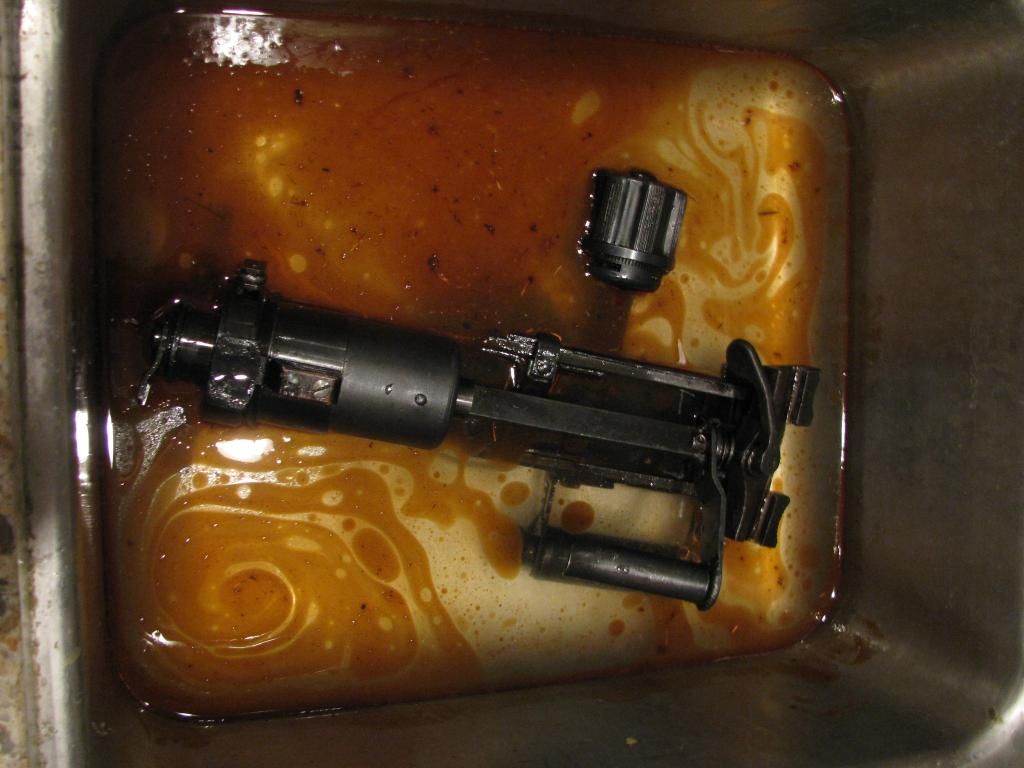
I sprayed the whole search fire assembly with WD40, wiped off as much of the grease as possible, soaked it in boiling water (melted the rest of the grease off) and then went back again with WD40. After a second wipe down, I flushed the unit out with some Break Free CLP. Its pretty clean now although I have not disassembled it (afraid to).
- Tommygunn
- Stabshauptmann
- Posts: 248
- Joined: Thu Jan 10, 2008 12:02 pm
- Location: Emilia Romagna, Italy
Re: Need help with Lafette restoration
As 42 said the elevating knob does click in and out about 5mm to engage/disengage with the two sliding limiters next to it.
The E&T Mechanism is really quite simple and nothing to worry about, the hardest part, and where your most likely to injure yourself, is separating the spring loaded plungers that connect the top cradle to the elevating yoke. That is a real pain but I give a description of how to do it in my restoration: viewtopic.php?f=24&t=12162.
I don't know how adept you are at these thing but is is no harder than taking a drill apart or an RC car etc.
I'd be happy to help you with it if you get stuck but just remember record what you do (photos) and bag or bowl associated parts and you'll be alright. In any case I'd be able to tell you what goes where and how.
To get the gunk off the best thing to use is a nice, big bowl, a paint brush and a jerrycan of petrol.
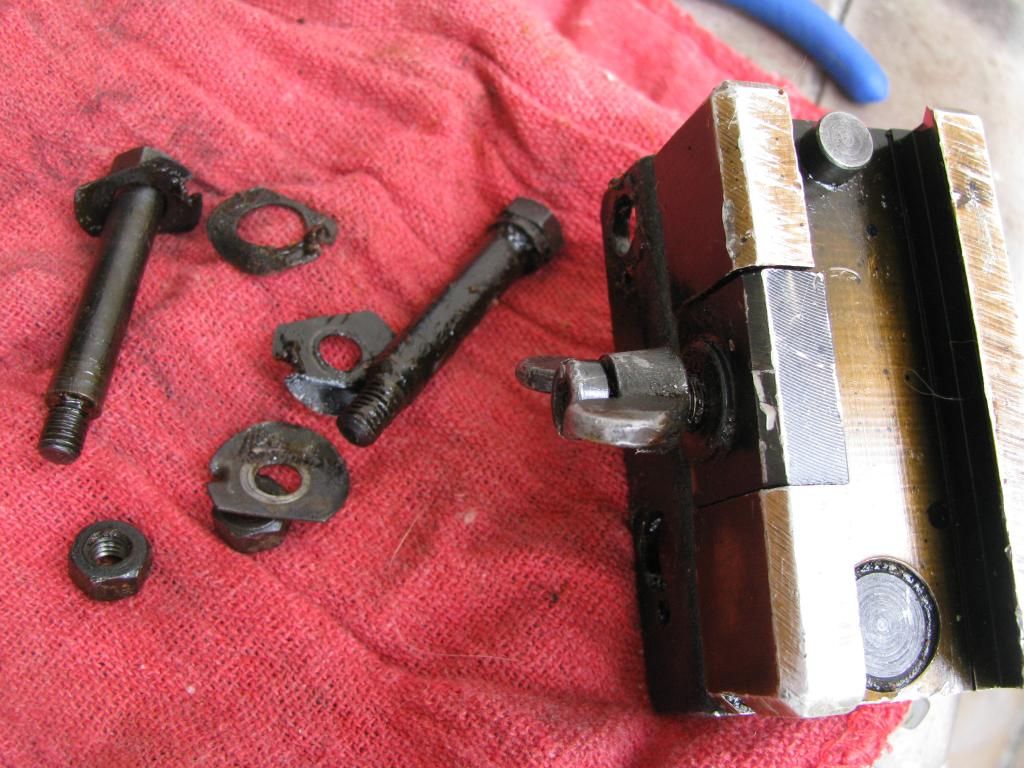
To get the rear leg wingnuts off you have to knock out the peened pins that go through the plain, circular nuts that retain each wingnut. Once the pins are knocked out the nuts will screw off and the legs will slide right off.
Tom.
- JBaum
- Administrator
- Posts: 3135
- Joined: Sat Mar 12, 2005 8:41 pm
- Anti-spam: Mg42
- Location: NE Ohio
- Contact:
Re: Need help with Lafette restoration
WD40 sucks when it dries. If dries very thick. In a corner or where there wasn't quite enough to drip, it's a thick gummy mess and difficult to remove after it dries. If you want to dissolve the packing gunk, use kerosene. It's cheaper, and dries without gumming up things you can't get to later. Dried WD40 will jam guns when it gets inside and can't be wiped off. I highly recommend against using it.
It's single benefit is that it displaces water, (Water Displacement, formula attempt #40). It does it's job well, but it's job is not for use on non-wet guns.
Re: Need help with Lafette restoration
Thanks everyone. I am pretty good at taking things apart. I've stripped and refinished a few rifles and can fully disassemble a handgun. That is one thing that interests me with firearms is the mechanics. I do take a ton of photos, and have bagged up my related parts. What bothers me with the Lafette is the lack of information. With a gun, I can find a Youtube video that shows how to take it apart AND put it back together. With the Lafette I have two vintage army manuals that show the parts and offer some basic descriptions but do not say how things come apart. I have trouble with some of the types of nuts (flat smooth nut with two holes instead of a slot) or the hinge pins that are peened into place and have to be hammered back out.
I don't let the WD40 sit or collect. I have just found it to work fast (plus I have it already). I have to clean the top slide part so maybe I will try some Kerosene. So far things are going along pretty good getting the parts taken down and cleaned before I strip them.
The painting part seems straight forward. I do know how to use a spray gun and airbrush and have a compressor etc. I plan on using cans of oxide primer and then using a spray gun to apply a urethane paint on top After that, it should be easy enough to put back together.
During reassembly I may replace the two rear peened pins that I had to remove with appropriate sized shoulder bolts. Of course I would keep the original pins. But the bolts would make future disassembly easier and quicker (with less risk to the finish).
Thanks again... this is going to come out great with your help.
Re: Need help with Lafette restoration
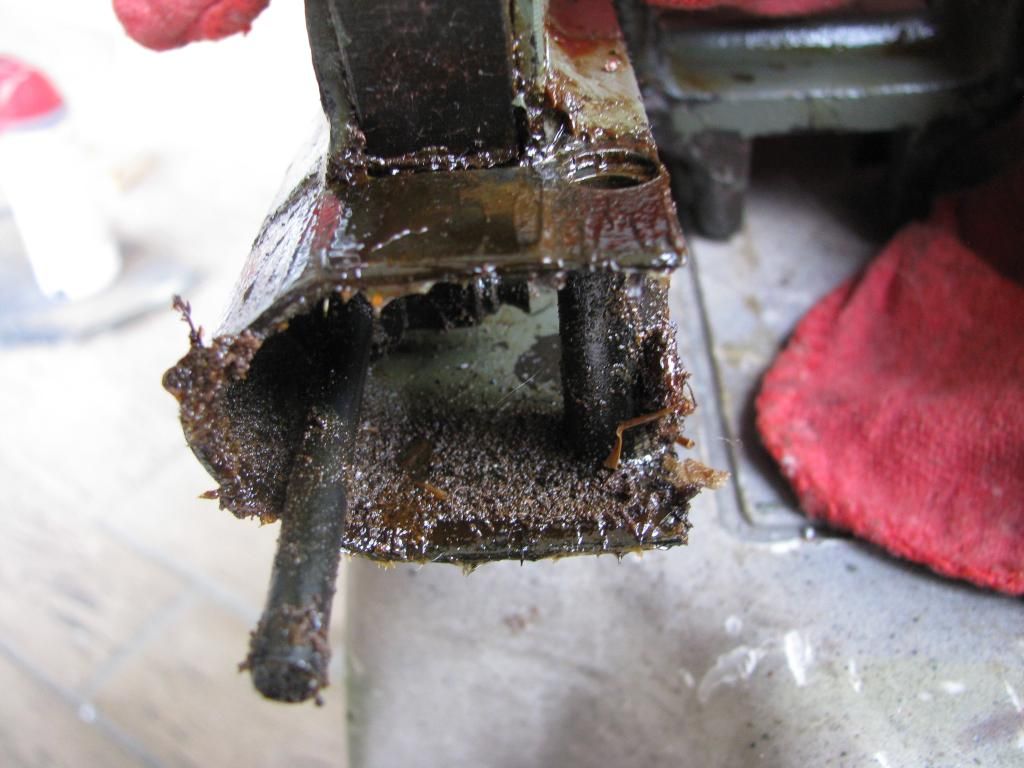
Okay, I made more progress today in taking down the recoil sled... but how do you take the buffer piston off the front end? I can't find a tool to undo the round, smooth, nuts with two holes in the face (and they are stuck as the shafts look to be peened.
Re: Need help with Lafette restoration
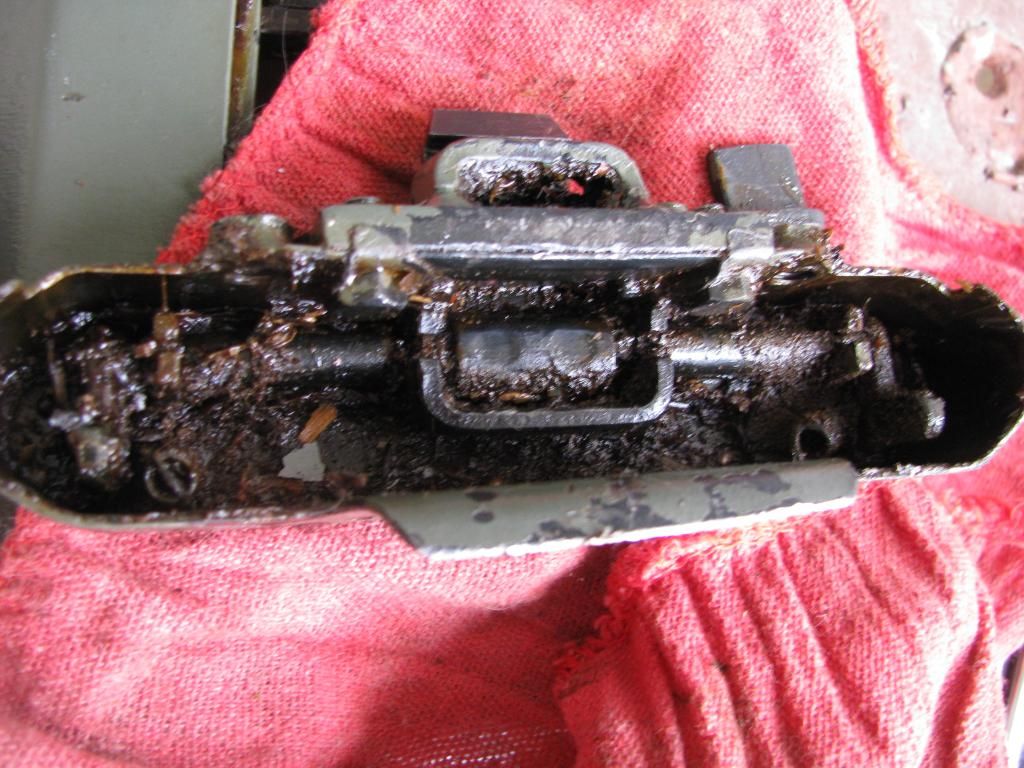
You can see what I am up against with the grease and dirt. This this is caked, inside and out, with mud and cosmoline.
The top of the slide is horrible inside. I could only get the rear end cap off. No clue about how to get the piston loose from the front wtih the funny lock nuts
I had to use a hammer to tap the end piece off, which was frozen. Disconnecting the two little springs with a pick was easy
The optical base came off pretty easy.
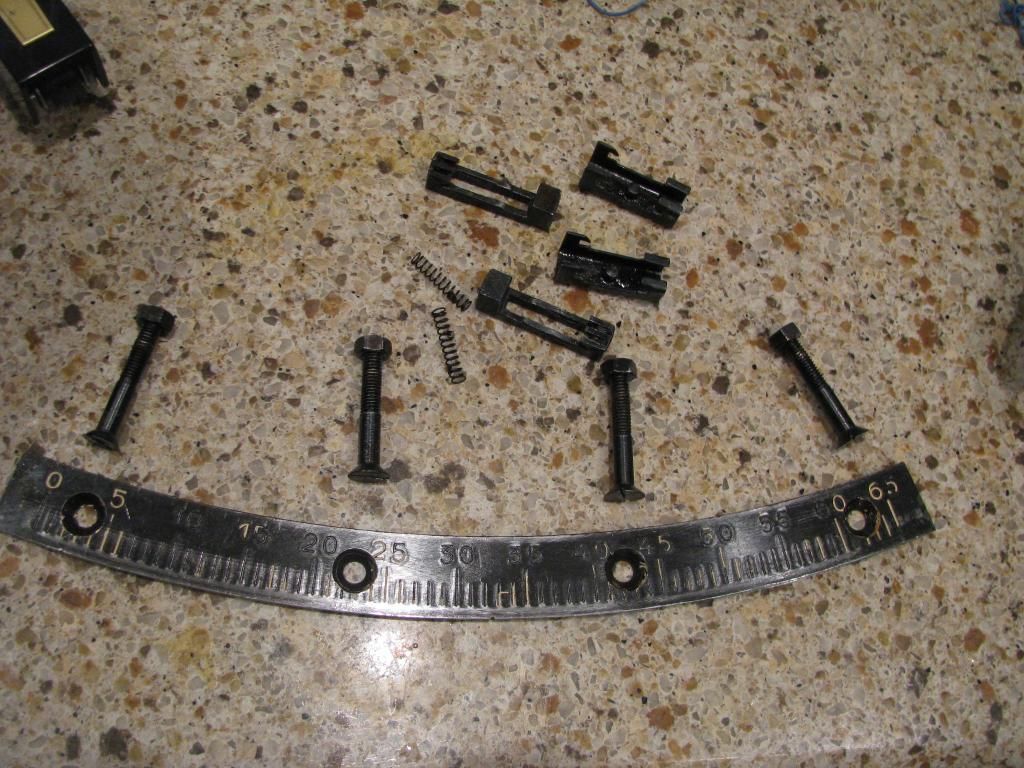
The firing arc and limiter clips cleaned up nicely. The arc seemed to have been blued metal so I have now touched that up a bit with some liquid bluing. Nail Polish works well for the engraved numbers.
- Tommygunn
- Stabshauptmann
- Posts: 248
- Joined: Thu Jan 10, 2008 12:02 pm
- Location: Emilia Romagna, Italy
Re: Need help with Lafette restoration
Blimey, it looks like a beehive.
What solvent are you using now? Petrol (Gasoline for you Yanks) would make light work of that in comparison to Paraffin (sorry, Kerosene). It is much more volatile and aggressive with grease and oil.
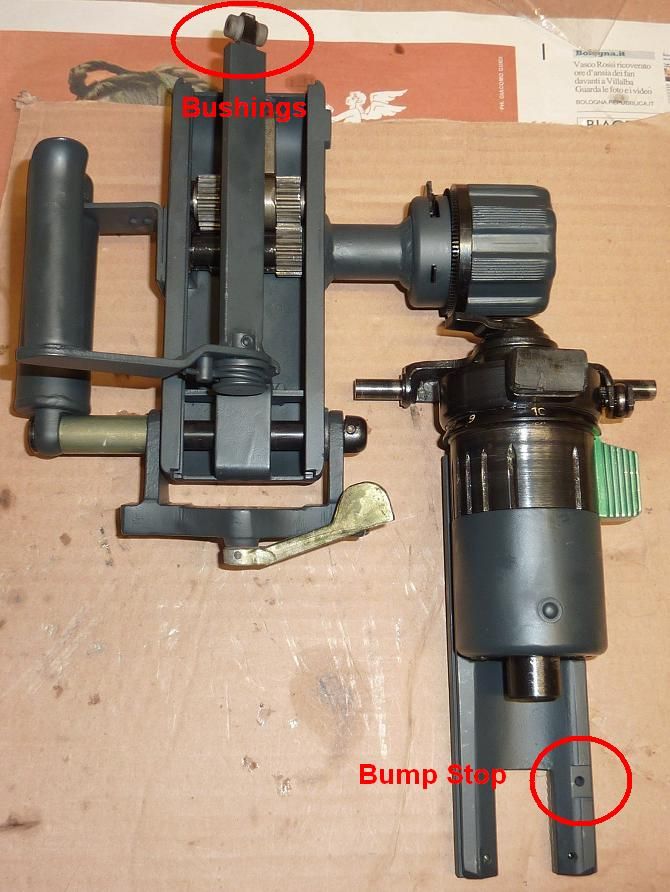
If you want, the E&T mech can be easily broken down into the two main pieces giving access to the elevating gears and axles. Just unscrew the slot headed bolt that holds the little L shaped bump stop in place and remove said piece. You can see it just left and below the Elevating knob in your first photo. Once removed you can rotate the 'E' knob all the way and the upper and lower will separate without any drama.
Watch out, as the rectangular trigger bar, that slides within the centre of the upper section, has two bushings that ride the internal track. Just don't lose them. See photo below.
Getting into the insides of the upper is more complicated but the above is very easy to accomplish.
Tom.
Re: Need help with Lafette restoration
Thanks! I did figure out how to take the two sections apart... I really need to take the bottom assembly apart to get the gunk out of the elevation knob, but I am rather afraid to get in there. I have not decided if I am going to repaint this unit. I know in WW2 they were painted, but I like the black...
Your photo confirms the position of the flanged side of the bushings.
So far I have used boiling water to melt the cosmoline (it floats off), WD 40 (it does melt it very fast), a pressure washer hose, and Break Free CLP. I am getting there slowly...
Any advice as to how to unscrew the recoil buffer from the front of the upper unit? The smooth nuts are hard enough to try to turn, but the buffer just rotates in my hand when I try to turn the nut.
Is there a graphic available for the German firing table?
- Tommygunn
- Stabshauptmann
- Posts: 248
- Joined: Thu Jan 10, 2008 12:02 pm
- Location: Emilia Romagna, Italy
Re: Need help with Lafette restoration
You'll need a peg spanner or circlip pliers to undo the nut and strap spanner or similar to grap hold of the cylinder/cylinder head. You might also be able to grab the nut and cylinder with some appropriately sized pliers, however, be sure to pad them with lead, brass or aluminium strip so as not to mar the surface.
You may also need to get a fine nail punch to knock back the couple of indentations that have been made to prevent the circular nut, at both ends, from unscrewing.
I really don't like the idea of mixing water with the T&E mechanism because internally and externally the steel is very prone to corrosion if allowed to sit.
When you say graphic, are you after specific dimensions or just a photograph?
Tom.
Re: Need help with Lafette restoration
For the range table, I was wondering if anyone ever did a full size reproduction of it or even a scan of one. That way I could have one laser etched or soemthing. Failing that I could have it printed on vinyl and applied to a tin plate.
- Tommygunn
- Stabshauptmann
- Posts: 248
- Joined: Thu Jan 10, 2008 12:02 pm
- Location: Emilia Romagna, Italy
Re: Need help with Lafette restoration
Allegheny Arsenal (mg34.com) does a fairly decent, not perfect, range plate:
http://mg34.com/product/lafette-mount-range-plate/
Tom.
http://mg34.com/product/lafette-mount-range-plate/
Tom.
Re: Need help with Lafette restoration
Thanks... that works. I will get one of those plates pretty soon.
Good news is that the paint on my Lafette seems to be easy (relatively) to remove. I sprayed the end cap with some Aircraft Stripper spray, and within just a couple of minutes, I could scrub off most of the paint with a brass brush. A swish in some liquid stripper took care of the rest. Looks like it was painted red primer, flat black and then green.
- Tommygunn
- Stabshauptmann
- Posts: 248
- Joined: Thu Jan 10, 2008 12:02 pm
- Location: Emilia Romagna, Italy
Re: Need help with Lafette restoration
You should start a restoration thread like I did to document your steps. Good to see what people get up to.
Tom.
Tom.
Re: Need help with Lafette restoration
Id be happy to. I have taken a ton of pics. I was thinking of doing something after the fact but I can do it step by step.
So far I have been doing pretty good. I have the fire control assembly cleaned pretty well without disassembly. I keep flushing it out with Gun Wash and CLP. Everything works very smoothly. I need to get the strap wrench to get into the recoil sled slide. The small stuff like the sight base, bolt box, etc is off. I need to figure out how to take the rear legs down. So far so good.
I am really sweating what to do with the fabric pads on the legs.... Sewing is not my strong point
- Tommygunn
- Stabshauptmann
- Posts: 248
- Joined: Thu Jan 10, 2008 12:02 pm
- Location: Emilia Romagna, Italy
Re: Need help with Lafette restoration
If your really up for it try and find a good, old school cobbler or an upholsterer, get some original or contemporary photos of the original leather pads (fabric pads are post war) and see if they can replicate the originals and stitch them on for you.
Tom.
Tom.
-
- Administrator
- Posts: 3251
- Joined: Fri Jan 11, 2008 6:03 pm
- Anti-spam: Mg42
- Location: Florida
Re: Need help with Lafette restoration
Looks like everything is going great with this. Doing a thread on this would be great. If you need help doing the thread let us know. Tommygunn are you ready for another??
Later 42rocker
Later 42rocker
-
- Administrator
- Posts: 3251
- Joined: Fri Jan 11, 2008 6:03 pm
- Anti-spam: Mg42
- Location: Florida
Re: Need help with Lafette restoration
Shelly
Another thing - Great added detail works on your tanks and other items. If you are meaning to share all of your photo bucket pics with us that's great. That said if not there is some type of limit that you can set on photo bucket as to what you share.
Later 42rocer
Another thing - Great added detail works on your tanks and other items. If you are meaning to share all of your photo bucket pics with us that's great. That said if not there is some type of limit that you can set on photo bucket as to what you share.
Later 42rocer
Re: Need help with Lafette restoration
I actually started a new PB account for this now...
Good idea about the cobbler. There is one near here. I need to talk to him about sewing a leather gun sling... Probably I can take one of the cloth pads apart and make a template for one in leather. Its not like they are overly complicated... its a rectangle with four sides that fold over. The hand sewing part is probably the more difficult thing.